
How to Build A Website With Squarespace 7.1

If you are looking for a website builder tool that is easy to edit, user friendly, and allows you to build a professional website then Squarespace is the perfect fit for you. Squarespace offers small businesses like you affordable and innovative website and marketing tools so you have the power to grow and scale our businesses. However, building a website from scratch can not only be intimidating it can also be an overwhelming task. To set you up on a path to success I came up with a few steps you can take to help you get started. So even if you aren’t a web designer you will have a professionally looking website up and running in no time.
Step 1: Plan and Gather Your Website Content
If you want to have a successful website you need to take some time to plan out what you want to share with the world. The more time you take on this the better your website will be. Start by creating your unique value proposition statement that tells your website visitors what your product and services are. You will also want to explain how your products or services solve their problems and what makes them unique. Then decide other key factors like how many pages your website will need and what images to use on your site? If you don’t already have one, create your brand identity which should include your business’s logo, submarks, icons, colors, and fonts. Make sure to optimize your images for the web by making sure their file size stays between 1500 px to 2500px wide and is less than 500 kilobytes in file size. Anything larger than that and it will take your page a long time to load. Also, this is bad for your site’s SEO. Once you have finished planning and preparing, it’s time to choose a template for your website.
Step 2: Choose A Template & Start Your Free 14 Day Trial
First You will need to choose a template. Squarespace makes this easy to do. When you register for an account they will ask you to choose a template for your website. The thing you need to be aware of is that no matter what template you choose in Squarespace 7.1 their functionality will be the same. So think of these templates as design templates that are there to help you achieve the goals of your website and how you want your website to work for you. If it seems overwhelming try looking at the template designs that go with your niche. What type of functionality will you need? Do you need a shop to sell products, or perhaps you are an artist and you need a portfolio to showcase your recent work? All those factors can help to make your choice on which template to pick a lot easier. Follow the steps below to choose a template.
How To Choose A Template
Go to Squarespace.com and click on template in the top navigation or click here template store
It will then take you to through several pages with survey questions designed to help you find the best template for your needs. They will ask you questions like the following;
-What's your site about? Click on as many options as you feel appropriate.
If none of the categories fit your needs you can describe it.
-What are your top goals? Some examples are sell products, sell services, etc. Select all that apply. If something interests you but isn't a top priority you can always remove it later.
-Where are you in your process? Squarespace will give you a few options to choose from so you can select the one that indicates the current stage you are at. Some examples are gathering inspiration, growing an existing business, etc. See the Screenshot below.Once you answer those questions, Squarespace will display a catalog of design templates based on your answers. Click preview on any design to see its demo site. Each demo site uses sample content to show an example layout and provide inspiration for your design.
Select the template you want to work in and create your account. Creating an account will give you a 14-day free trial to get started building your website.

Step 3: Add A Site Title and Upload a Logo
After you enter and create your email address and account password, the next thing you will want to do is add a site title. A site title could be your own name, the name of your business, your blog or your personal brand.
How to Add A Site Title & Logo
Go to the top left corner of your website preview and click Edit.
Next, hover over the top area of your page until you see the option to click on Edit Site Header. Then click Edit Site Header.
Third Click Site Title & Logo. Two sections will appear. A site title text field and an upload area for your logo
In the Site Title text field, enter a site title.
Pro-Tip: Remember that your site title appears at the top of all your website pages and it’s also used by Search engines so make sure to add one even when you use a logo.
Upload your logo from a file located on your computer.
Hover over Done and click Save.

Step 3: Set Up Your Website Navigation Menu
Before you can start working on building your perfect website it’s important to be aware that the pages on your website template are currently populated with demo pages. Squarespace provides the content on those pages to highlight layout possibilities. For you to customize or add pages you will want to get familiar with the Pages Panel. Let's take a look at how we do that.
Access The Pages Panel
The Pages Panel is found in the Home Menu located on the left-hand side of your Squarespace dashboard. (See photo below) This is where you create the structure of your site by adding and arranging pages. It is organized into two different areas of your website called: Main Navigation, and Not Linked
Main Navigation: As you already know the main navigation is a list of links to your most important pages and appears at the top of every page of your website.
Not Linked: Pages in Not Linked don't appear in your site's navigation. Visitors can access these pages by way of direct URLs unless you disable or password-protect them.
Pro-Tip: Not Linked is a great place to store in-progress pages or content that doesn't need to go in a navigation menu.

Step 4: Create Your Pages
How to Create A Blank Page
Now that you are familiar with the Pages Panel you can start creating the page you need or want on your website. So here are the steps you need to follow to create a page.
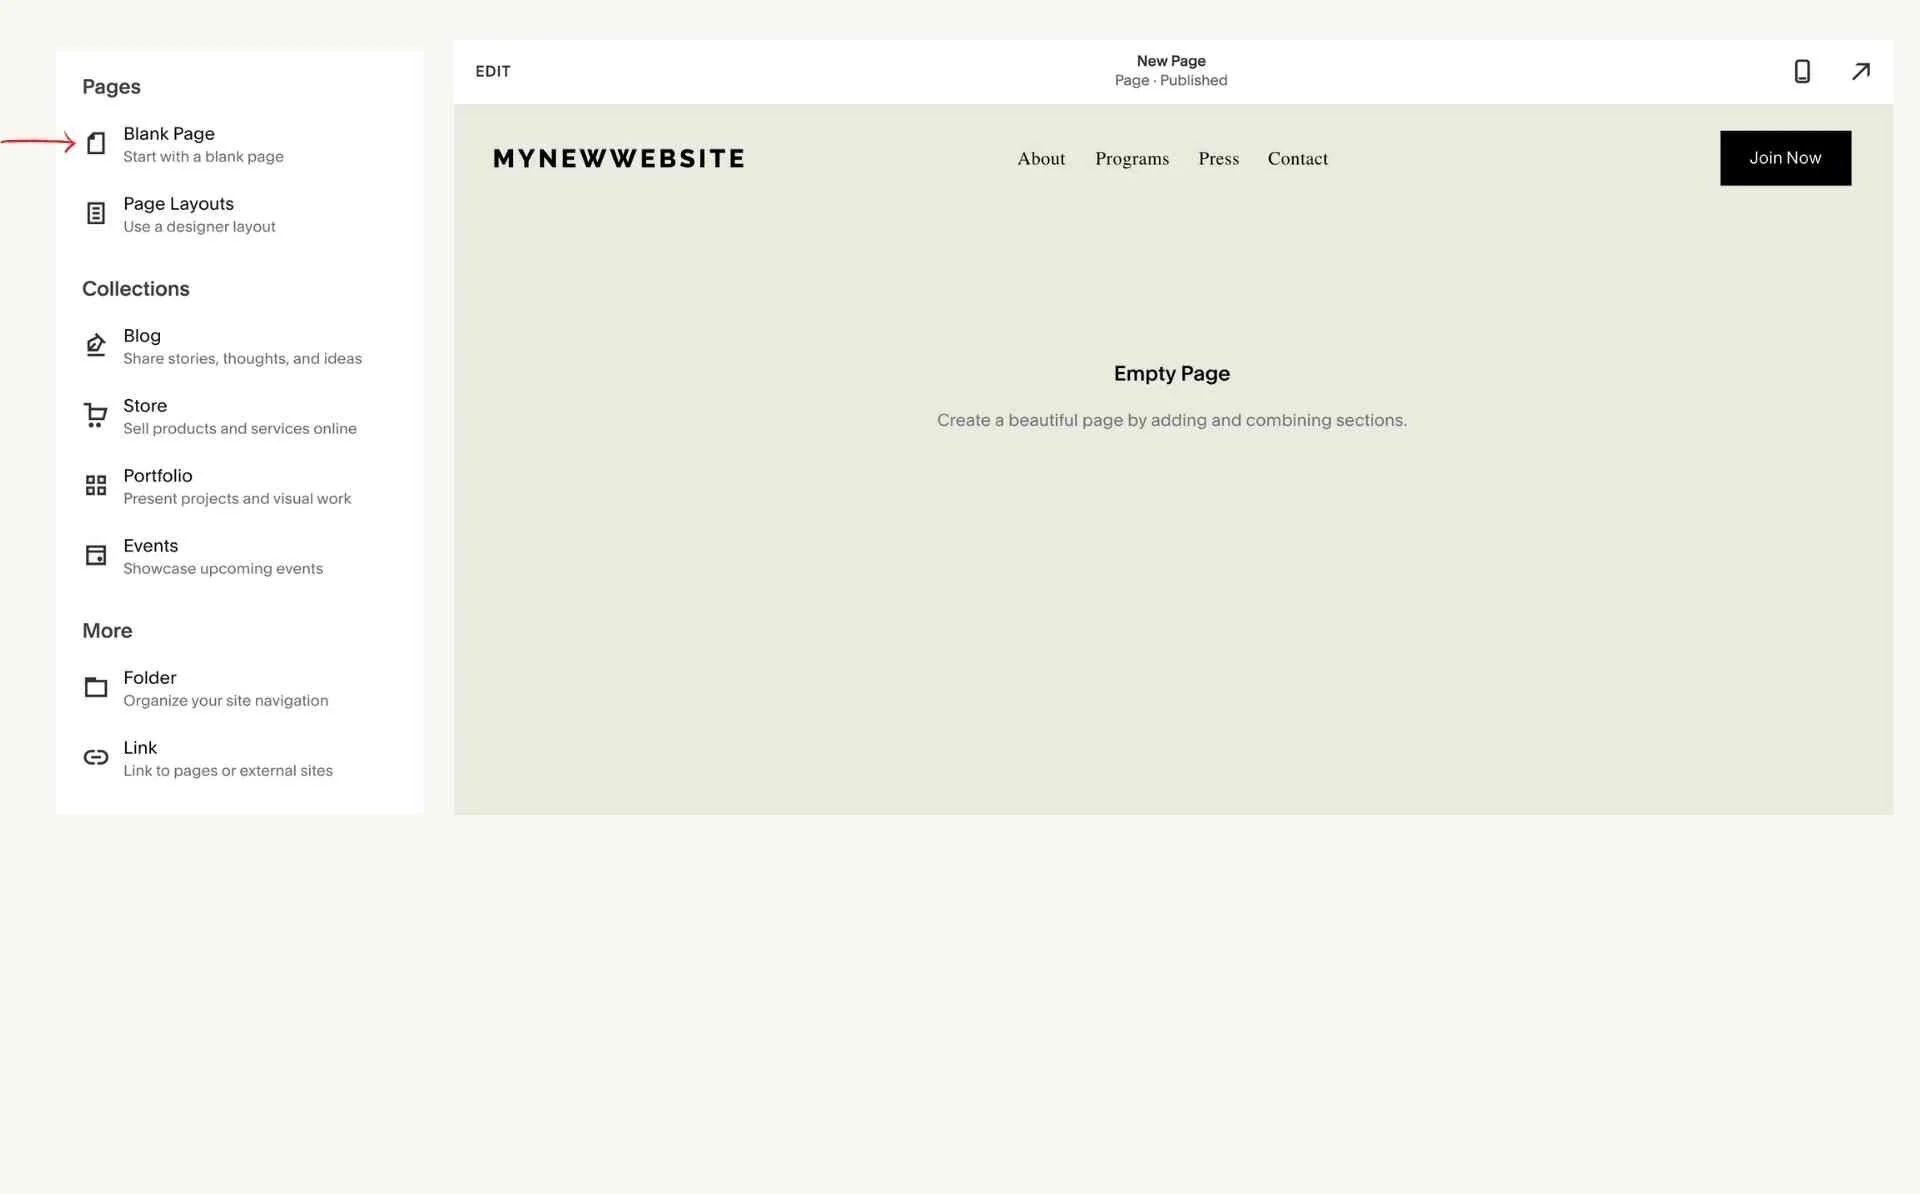
Access the Pages panel and follow the steps listed in Step 3. In the Pages Panel click on the + symbol next to “Main Navigation” or “Not Linked”
Select “Blank Page”. This will allow you to start with a blank canvas. Once a blank page has been added to your website you will be able to add sections with text and images and customize them by color, styles, and layout settings.
How to Create A Page Using Page Layouts
If you want to save time you can choose the page layouts option.
Access the Pages panel and follow the steps listed in Step 3. In the Pages Panel click on the + symbol next to “Main Navigation” or “Not Linked”.
Next Select “Page Layouts”. Once you choose the page layouts option a new pop-up window will appear. This is where Squarespace provides you with an assortment of premade layout sections you can select and use on your web page as a starting point.
The categories for this section consist of the following; General pages, appointments, about, contact, services, gallery, team, reviews, menu, rsvp, faq’s, privacy policy & terms of service.
Note it’s important to remember that pre-made designs are only a starting point. Each one is editable and customizable.

Step 5: Customize Your Squarespace Pages
Whether you opted to create a blank page or you created a page with a pre-made design section you will need to know how to customize and edit the page. one benefit to Squarespace 7.1 is the ability to stack multiple sections on a page and easily move them above or under one another to the desired position. It’s pretty easy to do too. Just follow these steps:
How To Add a Section To A Page
Find the page you want to add a section to and then select “Edit” in the top left corner.
If the page is blank you will see the words “Add Content”. Click on the blue button that says “Add a Section”,
Once you click the blue “Add a Section” button you will see the “Add a Section” page menu appear with the option to choose either a blank section “Add a Blank +” or a list of premade section templates. (see image below.)
If you choose to “Add a Blank +” section you can add your own text and content in the section by hovering over it and then clicking in the box.
If you choose a premade template section click on the content type you want to insert and then add your content.
Click done to save.
Pro-Tip: Although there is no limit to how many sections you can add they don’t recommend adding more than 20 sections per page as pages with lots of content take a longer time to load.

How To Add Content To A Blank Section
If you select the “Add a Blank +” section you can add your own content blocks to each page section by hovering over the blank page until you see a highlighted bordered box with blue plus + buttons in the center. Clicking on the blue plus symbol will allow you to add a content block to the page. Once you click on the blue plus symbol a menu appears with a variety of content block options. You can choose between your Basic content blocks, Image layout blocks, Summary blocks, and More.


How To Customize A Squarespace Page Section
You have even more control over each page section because you can adjust the height and with of the section, add an image or video to the section background or change the color and styles for each section. Here how to customize a section.
Hit Edit on the top left of the page. Go to the section you want to edit on the page. When you hover over it your section will be highlighted in blue.
You will see a three tabbed menu on the right of the section. It will have a pencil icon, a two-layer square icon, up and down arrows, and a trash can. Here is what each icon does:
-The pencil icon allows you to edit the section.
-the two-layer icon allows you to duplicate the section
-The up and down arrows allow you to move the section up and down the page.
-The Trash can allows you to delete the section.Click on the pencil icon and another three tabbed menu will appear. It will have a format tab, a background tab, and a color tab. Here is what each tab does:
-The format tab will allow you to adjust the section height, content width, and content alignment.
-The background tab allows you to add a background image or video.
-The color tab allows you to select one of your customized color themes and apply it to that section.

Step 6: Style Your Website Pages.
How To Use The Design Panel?
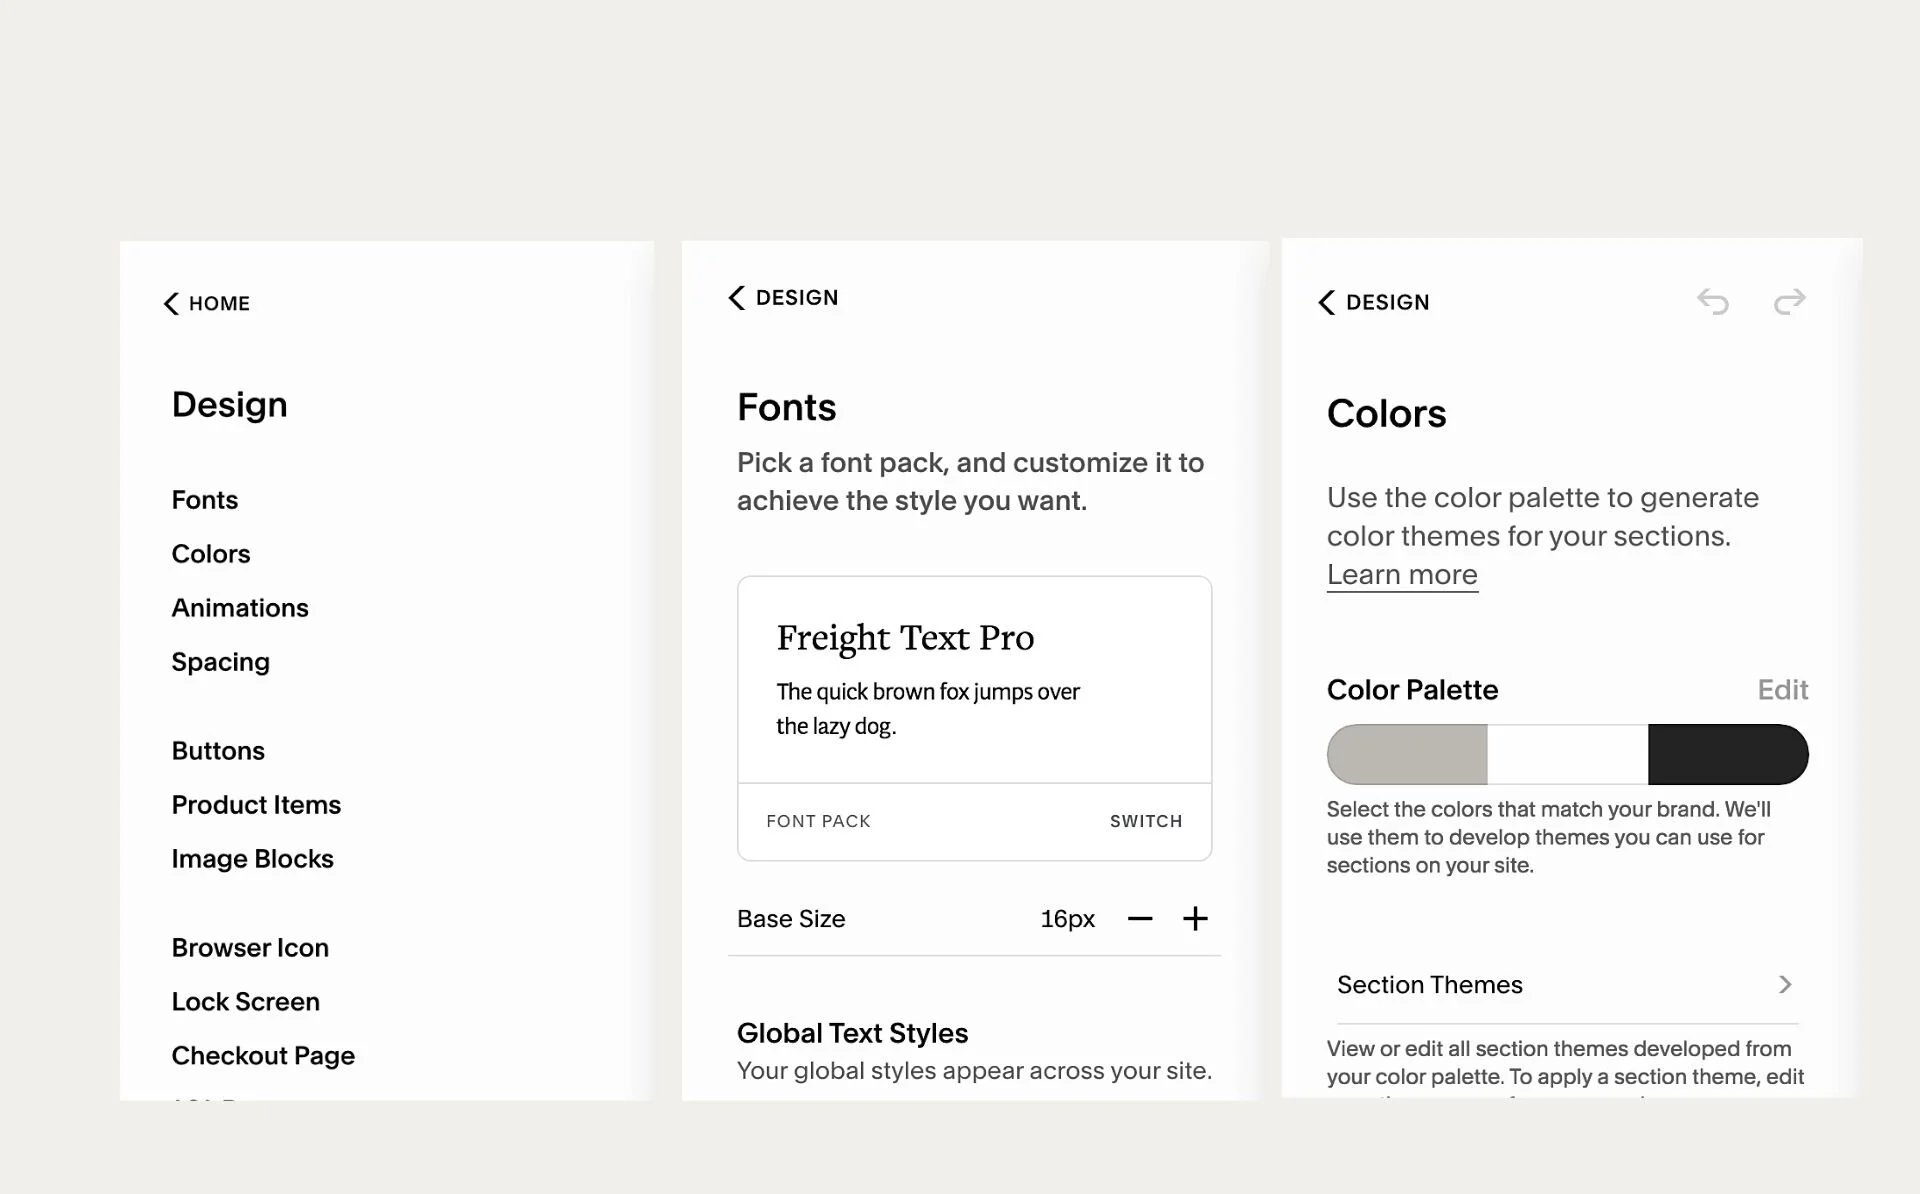
The Design Panel allows you to set global styles to your entire website for a consistent look. By using the Design Panel you can control your website’s overall aesthetics in one central place. Here‘s what you can do:
Fonts - Choose your font and apply it to all of your websites. In the design panel under fonts, Squarespace has font pack choices that are groups of fonts that pair together well together. You can select one and apply them (or change if you don’t see anything you want to use) to your text headings, body paragraphs, quotes, etc.
Colors - Choose your color scheme so it can be used consistently throughout your website. The design panel has a few predefined color panels that compliment each other and range from light to dark. However, you can also customize using your brand colors.
Animations - Add animations. Select a predefined animation to a text block and use it throughout your website.
Style Tweaks - Tweak even more elements like spacings, buttons, product items, image block styles, background width/color, browser icon, lock screens, checkout pages, social sharing logo, etc.
Step 7: Customize The Footer
How To Edit The Footer?
You will want to customize your website footer. The footer section is located at the bottom section of your site, below your page content. Customizing your footer is super important to the overall look and feel of your site because they appear on every page. So you will want to customize the colors, font links, and more. Most people use this section to add important links like contact information, social icons, FAQ, the website’s terms of services, and privacy policies. Also, you can have multiple sections in your footer so the possibilities are endless. Here is how to edit the footer area.
Click Edit on one of your website’s pages.
Hover over the footer area and click on the button edit footer.
Hover over the area until the insertion point is visible or highlighted.
Then add the content blocks you want to use in the section just like any other section on the page.
Using the three tabbed menus on the right of the section select the pencil icon and adjust the section’s format, background, and colors.
Hit Done to save your changes and your footer will appear at the bottom of each page.
Pro-Tip: Remember to delete the optional text "Made with Squarespace" text at the bottom of your footer (if you don’t want it there).
Step 8: Complete SEO Optimization & Final Touches
Squarespace SEO
Before you publish your website it’s important to take some basic steps to ensure that your website get’s noticed on search engines. Even if you don’t know much about SEO doing these basic tasks will make your website more Search engine friendly. Some basic steps to include would be to make sure to add a site title and description to your website. Then make sure to include titles and descriptions on all your website pages in each page setting. You will also want to turn on your website’s SSL certificate because this is an SEO best practice, as sites that aren't SSL-secured may be penalized in search engine rankings. Also, make sure all your images include a proper image file name and alt text. There is so much more to SEO and I will be writing more on that in a future blog post. However, if you include some of these basic Squarespace SEO steps you will be off to a great start.
Squarespace Analytics
Once you are done creating your beautiful website you will want to make sure you have access to how it’s performing online. Lucky for you Squarespace offers a comprehensive analytics tool that offers its customers lots of helpful and useful data. Like me, you will most likely find this feature useful. Unlike some of its competitors out there I really appreciate how much Squarespace is thinking about providing tools that will help its customers succeed. It is worth pointing out though that depending on the Squarespace plan you have you will get more or fewer data options. This is important because once you build your website you will want to stay on top of things like what your website traffic is on a daily, weekly, monthly, or annual basis, or find out which pages on your website are most popular and many other helpful tidbits like that. To access your Squarespace analytics just log in and in the home, menu select the analytics. This will take you to your analytics dashboard.
Google Analytics
Alternatively, some website owners rely heavily on Google Analytics a free service offered by Google to give them even more details and tracking info that goes beyond what Squarespace offers. After all, it’s Google! By integrating Google Analytical software to your Squarespace website you will be able to track things like the amount of time a visitor spends on your website, how many of your pages they visit, whether they are new or returning or what your website’s bounce rate( how long a visitor stays on your website) is. You can even get real-time reports where you log in and see who is visiting your website at that very moment. All this is super helpful and I use both. Squarespace has also made it easy to integrate with your website. You can read the steps to do it here
Step 8: Purchase Hosting & Domain
Purchase Squarespace Plan
One of the things you will want to do before you launch your website is to choose and purchase your hosting plan. Squarespace offers four different plans for you to choose from. All of the plans come with 24/7 customer support and you can cancel your plan at any time. You can learn more about their different plans and prices here. Also, you have the option to pay monthly or annually and they give you a discount if you pay for your plan annually. I recommend you choose the plan that works best for your business needs.
Choose A Domain
If you have not already purchased a domain name from another domain company, Squarespace offers domain name purchasing. When you purchase a domain name through Squarespace you get privacy protection free. Many people including me see the value in this as typically depending on which hosting company you go with additional fees like the privacy protection fees can add up. Also, another sweet benefit is that if you pay for a Squarespace annual plan, you will get your domain free for the first year. The setup is quite straight forward simply go to Settings in the home menu then select the domain you want.
For more details on how to connect your domain from another domain company like ( Namecheap, GoDaddy, BlueHost, etc) you can read more here.
Step 9: Launch Time
The final step in building a Squarespace Website in 7.1 is to make it public. Squarespace calls it publishing your website. You can do this by pushing the blue “publish your website” button at the bottom of the website or go to Settings in the Home menu and change your website viewership from private to public. Then Voilà! Your website will be live. 👏🏽 🎉🍾
That’s it! Hopefully, you found this post helpful. Creating your business website doesn’t need to be hard or complicated. Also, Squarespace makes it easy with their high-end professional design templates and easy to use platform. However, if you feel like building your website on your own isn’t for you or you still need an assist, I can help. I provide premium Squarespace website design services at reasonable rates. Just request a discovery call to discuss your website project.